Arthur's Remodeling

Blog

grouting
Blog

How Proper Grouting Extends the Life of Your Tiles

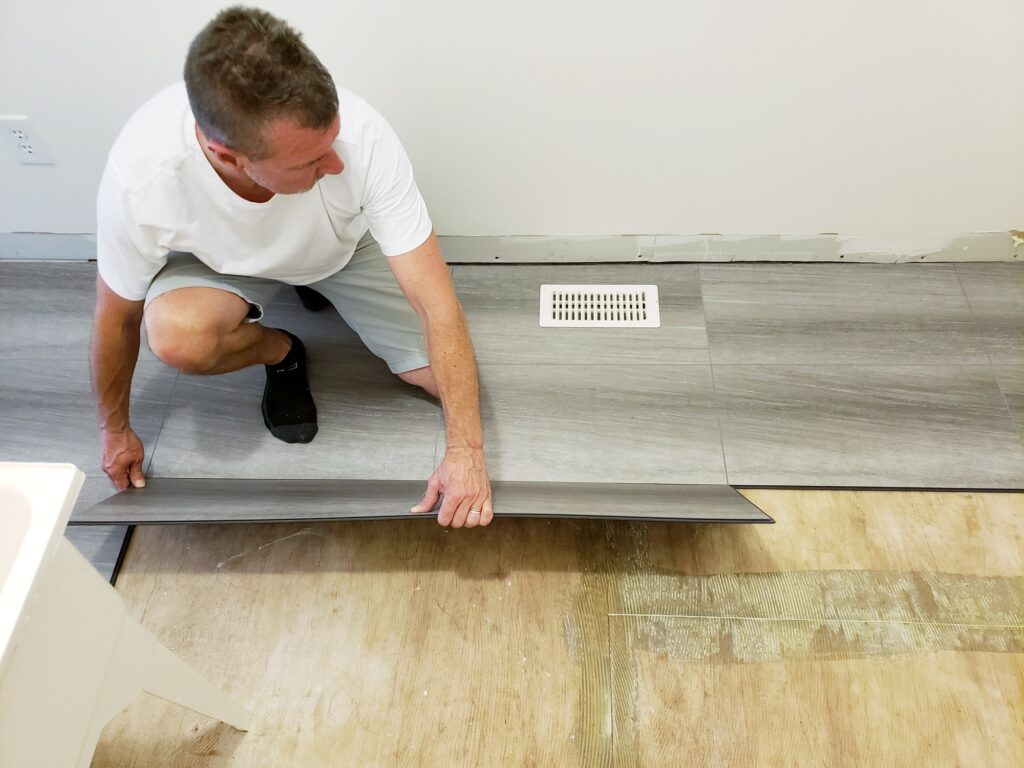
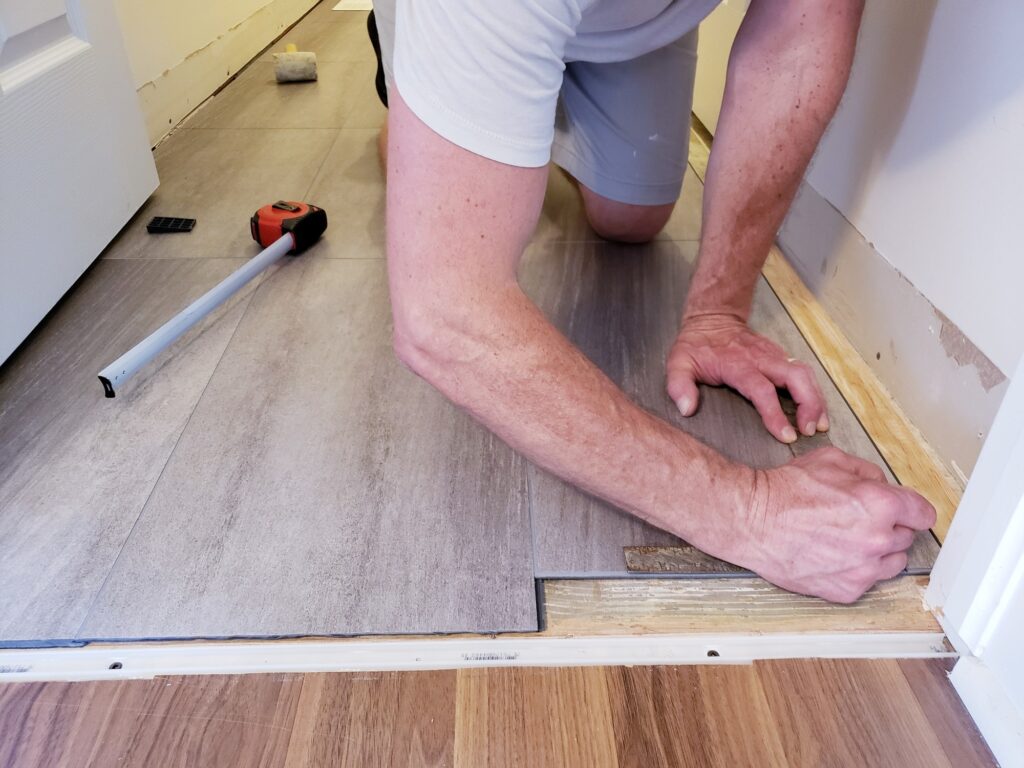
You picked out gorgeous tiles. Laid them perfectly. Stepped back and admired your work. Then a year later, the grout is cracked, crumbling, and dark in spots you cannot scrub clean. Now water is sneaking behind your tiles, and you are wondering what went wrong. Here is the thing. The importance of tile grout is more than just about looks. It is the glue, the shield, the unsung hero that keeps your tile from falling apart. Poor grouting damages tile over time in ways you do not see until the damage is already done. This blog walks you through how proper grouting extends tile life and why skipping the right technique or cheaping out on materials will cost you later. No fluff. Just what you need to know. What Is Tile Grout and Why Is It Important? You see grout as the thin lines between your tiles. But it is doing a lot more than just sitting there. Tile grout is the material used to fill the joints between tiles. It seems simple but the grouting of tiles is what turns individual pieces into one solid surface. Without it, your tiles would shift, crack, and let water destroy whatever is underneath. Why tile grout is important for durability comes down to three jobs. It seals out moisture. Water is the enemy. Grout blocks it from seeping under your tiles where it can rot subfloors and grow mold. It locks tiles together. The tile filling method creates a rigid surface that spreads weight evenly. No single tile takes all the pressure. It protects tile edges. The edges of tile are vulnerable. Grout acts like a bumper, absorbing impacts that would otherwise chip or crack your tile. So when someone asks why is tile grouting important, the answer is simple. Without it, your beautiful tile floor is just a collection of loose pieces waiting to fail. Tile and grout work as a team. One cannot last without the other. The Importance of Proper Tile Grouting Good grout makes your tile last. Bad grout ruins it. That simple. But what happens if tile grout is not done properly? Let us count the ways. Cracks appear. Improper mixing or application leads to shrinkage cracks. Water finds those cracks. Then your subfloor finds trouble. Tiles loosen. Grout that is too thin or not packed tight lets tiles shift. Once one moves, others follow. Soon you have a wobbly mess. Stains set in. Unsealed grout drinks spills like a paper towel. That red wine from two years ago? Still there. Mold moves in. Damp, porous grout is a mold hotel. Once it starts, cleaning only scratches the surface. Grout for tiles is not a place to cut corners. The cost difference between cheap grout and quality grout is small. The cost difference between a floor that lasts twenty years and a floor that fails in five is huge. The bottom line? Proper grouting is not an extra step. It is the step that decides whether your tile investment pays off or falls apart. How Proper Grouting Extends Tile Life Here is where good grouting proves its worth. It Stops Water at The Surface A properly installed and sealed grout line blocks moisture before it ever reaches your subfloor. Water is sneaky and it finds the smallest crack, the tiniest pinhole, and then it starts working. This means swollen plywood, rotting wallboard, and mold growing where you cannot see it. Grout sealing is what turns porous cement into a water resistant barrier. Skip it and your grout becomes a highway for moisture. It Absorbs Movement Houses settle, temperatures change, and floors flex. That is not a design flaw, it is just physics. Tile grouting that is done correctly acts like a shock absorber as it lets the whole surface move together instead of cracking apart. Think of it like the mortar between bricks. A little give prevents a lot of break. Grout that is too hard or too brittle will crack under pressure. Grout with the right flexibility bends without breaking. It Spreads The Load Drop a heavy pan on a tile floor. If the grout is doing its job, that impact spreads across multiple tiles instead of hitting one. Tile lifespan increases dramatically when weight and stress get distributed evenly. Without proper grout, that same dropped pan cracks a single tile. And now you are hunting for a matching replacement and paying someone to cut out and replace just one piece. With good grout, you wipe up the spill and move on with your day. It Prevents The Domino Effect One loose tile leads to another. That is not a saying. It is what actually happens. A tile shifts slightly, putting pressure on its neighbor. That neighbor shifts, putting pressure on the next. Soon you have a wobbly mess that needs complete replacement. Proper grouting locks each tile in place so nothing shifts so your floor stays flat, your walls stay straight, and your repair bills stay low. Grout sealing for tiles every year or two keeps this protection going. Skip it and your grout becomes a sponge. Stay on top of it and your tile stays solid for decades. Choosing the Right Grout for Your Tiles Not all grout is the same. Pick wrong and you will be regrouting in a few years, kicking yourself for not spending the extra twenty bucks upfront. Cement Based Grout This is the standard option. Affordable and easy to work with, which is why most contractors use it by default. But here is the catch. It is porous. Water and stains soak in like a sponge unless you seal it regularly. Skip the sealing and that nice light gray grout turns into a muddy brown mess. Best for dry areas like living rooms, dining rooms, and bedrooms where spills are rare. Epoxy Grout Epoxy is the tank of grouts. Waterproof. Stain proof. Mold resistant. It does not need sealing because it is already sealed from the factory. The

tile-installation
Blog

3 Hidden Costs of Tile Installation Most Contractors Don’t Mention

You got a quote for your tile installation. The number looked fair, you shook hands, maybe even paid a deposit. Then the work started and suddenly there is a charge for leveling the floor. Another one for hauling away the old tile. And why is the grout so expensive? Your budget just grew legs and ran away. Here is the thing. Hidden costs of tile installation most contractors don’t tell you are not accidents. They are almost guaranteed. Contractors quote the pretty part; the tile itself, the basic labor. But the real work happens underneath, and that is where the surprises live. This blog walks you through the three biggest hidden costs that blow up tile budgets. No fine print. Just what you need to know before you sign anything. 1. Subfloor Preparation – The Foundation of a Successful Tile Installation Tile is not forgiving. It goes exactly where you put it and stays there. If the floor underneath is uneven, your tile will crack, corners will stick up, and you will spend years staring at that one annoying lippy edge. What is Subfloor Preparation? Before a single tile gets laid, the surface underneath needs to be flat, clean, and solid. That means fixing low spots with leveling compound, grinding down high spots, replacing rotten plywood, and sometimes installing cement backer board for stability. Why This Blows up Your Budget Here is the kicker. Most tile installation contractors cannot see the subfloor condition until the old flooring is ripped out. So they quote assuming everything is fine. Then reality hits. That is when the change order arrives. A tile installation estimate that looks reasonable on paper can jump by $ 5 to $ 8 per square foot just for leveling. For a 200 square foot bathroom, that is an extra $ 1,000 to $ 1,600 you did not plan for. So when figuring out what extra costs are involved in tile installation, remember that this is number one. Always ask your contractor to check the subfloor before giving you a final number. If they refuse, find someone else. 2. Old Flooring Removal and Disposal – The Hidden Labor and Hauling Fees You are paying for a new tile. But first, someone has to get rid of the old floor. The Real Cost of Demolition Ripping up old tile is backbreaking work. It is loud, dusty, and slow. If the old tile was glued down with mastic or thinset, the job gets even harder. Tile installers charge for this time, and it adds up fast. Tile installation cost often gets quoted as just the installation. The removal part? That is a separate line item that appears after the old floor is already in the dumpster. And with that in mind, expect to pay $ 2 to $ 7 per square foot just to tear out and haul away. A small kitchen could cost an extra $ 500 to $ 1,500 that was not in your original cost of tiling a floor estimate. The Disposal Surprise Dumpster rentals are not free. Landfills charge more for heavy materials like ceramic tile and old mortar. Some contractors leave disposal off the quote entirely, then hand you a bill at the end. Why is the cost of tile installation cost higher than the initial estimate? This is reason number two. Ask one simple question before you hire. Does your quote include demo and disposal? If the answer is anything but a clear yes, keep asking. Other things that increase tile installation cost also include unexpected discoveries like asbestos or lead in older homes. Those require specialized hazmat crews and can triple the removal budget. 3. Material Waste and Specialized Materials – The Overlooked Budget Busters You measured the room. You know exactly how many square feet you need. So why is your tile installer asking you to buy extra boxes? The Waste Allowance Tile breaks, it gets cut wrong, and corners and odd angles require partial pieces. Which is why professionals add 10 to 15 percent extra to any tile installation quote to account for this. That extra tile costs money. Sometimes the contractor leaves it off the estimate entirely, expecting you to figure it out when you run out halfway through the job. Installing tile also requires more than just tile. Underlayment, thinset mortar, grout, sealant, and waterproofing membranes all add up. A roll of waterproofing membrane for a shower can cost $ 450 to $ 750 by itself. That probably left you wondering, “How much should I expect to pay for tile installation?” A complete answer includes all these extras. So when you get a quote, ask for a cost breakdown of tile installation that lists materials separately from labor. Factors Affecting The Cost of Tile Installation Not all tile jobs cost the same. Here is what moves the number up or down. Tile size and shape Large format tiles go down faster but need a perfectly flat floor. Small mosaic tiles take forever to install because every piece needs placement. Herringbone or diagonal patterns? More cutting, more time, more money. Material choice Ceramic is budget friendly. Porcelain costs more but handles moisture better. Natural stone like marble or slate looks incredible but requires sealing and special care. The cost breakdown of tile installation changes dramatically based on what you pick. Room complexity A square bathroom with no obstacles is quick. A kitchen with cabinets, an island, and a weird angle? Slower. Every cut around a toilet flange, door jamb, or vent adds labor time. Location Tile in a living room on a flat plywood subfloor is straightforward. Tile in a shower requires waterproofing, sloping for drainage, and extra sealing. That is a different skill set and a different price. Accessibility Second floor bathrooms mean carrying tile and tools up stairs. Tight hallways slow everything down. If the installer has to park far away and walk materials in, expect that reflected in the quote. Pro tip: When comparing bids, look at the

perfect-flooring
Blog

How to Choose the Perfect Flooring in 5 Simple Steps (Room-by-Room Guide)

You are standing in the flooring aisle, surrounded by samples that all start to look the same. Wood? Vinyl? Tile? Your phone is full of screenshots, your head is spinning, and you still have no idea what actually goes in your bathroom versus your basement. Here is the thing. Knowing how to choose the right type of flooring is not about picking the prettiest sample. It is about matching the floor to how you actually live. A kitchen needs different stuff than a bedroom. A bathroom is not a living room. Get it wrong and you are replacing it in two years. This guide walks you through how to choose the right flooring in five simple steps. Room by room. No overwhelm. Just straight answers that save you time, money, and a whole lot of second guessing. Step 1: Understand the Function of Each Room Before you fall in love with a floor, think about how the room actually lives. High-traffic areas Your entryway, hallway, and living room take a beating. Shoes, paws, rolling chairs, dropped keys. These spaces need flooring options that do not show every scuff. Tile and vinyl flooring handle the abuse well. So does hardwood flooring, though it asks for more care. Moisture-prone areas Kitchens and bathrooms are not forgiving. Spills happen, steam happens, and kids happen. What you need is waterproof materials here. Tile, stone, and vinyl shed water like a duck’s back. Just keep wood and laminate flooring away from these rooms unless you like swelling and regret. Comfort zones Bedrooms and living rooms are different. You walk barefoot here. You sit on the floor. You want warmth and quiet under your feet. Bedroom flooring choices often lean toward carpet for that soft, muffled feel. engineered wood flooring offers a nice compromise — wood looks without the high maintenance. How to figure flooring for a room? Ask yourself three questions. Does water hit this floor? Does everyone walk here? Do I sit or stand here for hours? Answer those and you are halfway done. Step 2: Explore the Types of Flooring Available Now let us talk about what is actually out there. Here are the most common types of flooring you will run into. Hardwood flooring Looks amazing and adds home value. But it scratches, hates water, and costs real money. Best for living rooms and bedrooms, not kitchens or basements. Engineered wood flooring Real wood on top, plywood underneath. More stable than solid hardwood. Works in basements and over concrete. Still not great for soaking wet areas. Laminate flooring The budget friendly wood look that resists scratches and dents. But water is its enemy. One good spill and the edges swell up. Good for living rooms and bedrooms, bad for bathrooms. Vinyl flooring Comes in planks or sheets and looks like wood or stone. Waterproof, scratch resistant, easy to clean. One of the best all around choices for kitchens, bathrooms, and basements. Tile flooring Porcelain and ceramic. Extremely durable and waterproof. Feels cold and hard underfoot. Perfect for bathrooms, kitchens, and entryways. Consider heated floors if you go this route. Stone flooring Marble, slate, travertine. Natural and beautiful, but also expensive, cold, and high maintenance. Sealing required. Best for statement spaces, not the whole house. Carpet Soft, warm, quiet. Great for bedrooms and cozy living rooms. Terrible for dining rooms, entryways, or anywhere with spills. Hides nothing after a while. What are the most popular flooring options? Right now, vinyl and laminate lead the pack because they balance cost, durability, and looks. Step 3: Evaluate Durability and Maintenance Needs Not all floors are built the same. Some handle chaos. Others demand white gloves. Which flooring is most durable and long-lasting? Let us rank them. Tile and stone – Nearly indestructible. A dropped pot? Tile laughs. Spilled wine? Wipe it. These floors outlast your mortgage. Downside? Cold and hard. Vinyl – Surprisingly tough. Waterproof. Scratch resistant. Kids and pets? No problem. Luxury vinyl plank (LVP) looks like wood but acts like armor. Engineered wood – Decent durability. Handles humidity better than solid hardwood. But sharp objects and heavy furniture can still mark it. Hardwood – Timeless but tender. Scratches show. Water ruins it. Refinishing brings it back, but that is work. Great for low-traffic living rooms. Risky for active households. Laminate – Scratch resistant. Dent resistant. Water sensitive. Good for dry areas. One leaky pipe and you are replacing it. Carpet – Least durable. Stains settle in. Wear shows in high-traffic spots. Soft and cozy, but not built for battle. Tile and vinyl ask almost nothing. Sweep. Mop. Done. Hardwood wants special cleaners and no wet mops. Carpet needs regular vacuuming and occasional steam cleaning. Laminate hates standing water. If you have kids, pets, or just a busy life, vinyl flooring and tile flooring are your friends. Pretty floors are nice. Floors that stay pretty with no effort are better. Step 4: Match Flooring to Your Style and Budget You want a floor that looks good and does not break the bank. Fair enough. Style Choices Light floors make small rooms feel bigger. Dark floors add drama and hide some dirt. Wide planks feel modern. Narrow planks lean traditional. Gray and white oak are everywhere right now. Warm brown tones never go out of style. For a classic look, marble flooring or ceramic flooring in a herringbone pattern says luxury. For a cozy farmhouse feel, wide pine or oak planks work. For modern spaces, large format tiles or sleek vinyl planks in greige (gray+beige) fit right in. The best flooring for living room often means hardwood or engineered wood. Warm, natural, welcoming. But vinyl plank has gotten so good that even designers cannot tell the difference from across the room. Budget breakdown Budget friendly (2–5 per sq ft): Laminate, sheet vinyl, basic carpet, some ceramic tile. Mid range (5–10 per sq ft): Luxury vinyl plank (LVP), good laminate, engineered wood, solid hardwood in domestic species. Premium ($10+ per sq ft): Solid hardwood in

Blog

6 Reasons Your Drain Keeps Clogging (Even After Cleaning It)

You clear the drain and it works fine for a week. Then the water starts pooling again. Same sink, same slow gurgle, and the same frustration. You pour more cleaner down, plunge again, but nothing changes. So here you are, asking yourself why does my drain pipe keep clogging after cleaning? But what causes a drain to clog? Not what you think. The hair you pulled out? That was just the tip of the iceberg. The real problem is hiding deeper, where your DIY fixes cannot reach. This blog walks you through the six real reasons your drain keeps clogging even after you clean it. And more importantly, how to stop the cycle for good. Partially Cleared Blockages – The Hidden Culprit You plunge the toilet or pour cleaner down the sink. Water flows again and you feel relieved. But here is what you do not see. You only pushed a hole through the clog, not cleared the whole thing. That leftover debris still stuck to the pipe walls acts like a net. It catches every little bit of soap, hair, and food that comes next. Within days or weeks, the drain is clogged again. Same spot. Same headache. Cleaning the drains with a quick fix feels productive, but it is not solving the real issue. Think of it like scooping the top off a moldy jar of jam. The stuff underneath is still there, waiting to grow back. Most store bought drain cleaners make this worse. They burn through the middle of the blockage but leave the pipe walls coated in residue. That rough, partially cleaned surface actually grabs new debris faster than a smooth pipe would. So reasons your drain is still clogged after cleaning often come down to one simple truth. You never really finished the job. Grease and Oil Buildup in Kitchen Drains You rinse the frying pan. A little bacon grease goes down the drain. No big deal, right? Wrong. That grease is hot now. But the further it travels down your pipes, the more it cools. And when it cools, it hardens. Now you have a greasy, sticky coating on the inside of your pipes. Food scraps stick to it. Soap scum joins the party. Over time, you have a thick sludge that traps everything. This is one of the main reasons clogging the drains in kitchens happens over and over. You are not seeing the buildup. You are just noticing when it finally blocks completely. Keep the drains clean in the kitchen by doing one simple thing. Pour grease into a jar or can, not down the sink. Wipe oily pans with a paper towel before washing. And use a mesh strainer to catch food scraps. A drain clogging problem that keeps coming back in the kitchen almost always traces back to grease. Stop it at the source. Hair and Soap Scum in Bathroom Drains You pull a clump of hair out of the shower drain and think “problem solved.” A week later, water is pooling around your ankles again. Sound familiar? Here is what is happening. Hair acts like a net. It catches soap residue, dead skin cells, and minerals from your water. That sticky mess builds up deep in the pipe, not just near the surface. Why does my drain keep clogging in the bathroom? Because you are only grabbing what you can reach. The real clog is sitting farther down, where your fingers and a cheap plastic snake cannot go. The drains are cleared temporarily, but the thick buildup on the pipe walls remains. Think of it like plaque in an artery. A small opening lets water through, but the narrowing gets worse over time. If you wanna know how to keep drain pipes from clogging in the bathroom, start with prevention. Install a mesh strainer over the drain. Clean it weekly. And flush the drain with hot water after every shower to melt away soap residue before it hardens. Hard Water and Mineral Deposits If you live in an area with hard water, your pipes are fighting an invisible enemy. Calcium and magnesium do not just leave white spots on your glasses. They leave rough, crusty buildup inside your plumbing. That scaly layer makes the inside of your pipe feel like sandpaper, and sandpaper catches everything. Grease, hair, soap scum, food particles, you name it. Over time, hard water narrows your pipe diameter significantly. A drain that should handle normal usage starts clogging the drains constantly because there is simply less space for water to flow. How to prevent drain clogs from hard water starts with a water softener. It removes those minerals before they ever reach your pipes. If a softener is not an option, schedule regular professional drain cleaning to scour away the scale buildup. Structural Issues and Aging Pipes Sometimes the problem is not what goes down the drain. It is the pipe itself. Old pipes corrode from the inside. The smooth interior becomes rough, pitted, and narrow. Every bit of debris that passes through has a new place to snag. Over time, drain clogging problem becomes chronic because the pipe can no longer do its job. To fix clogged drain issues caused by structural problems requires more than a plumbing snake. A camera inspection can find the exact spot where the pipe is failing. Sometimes hydro jetting clears the buildup. Other times, sections of pipe need replacement. However, the best way to stop drains from clogging in older homes starts with knowing what shape your pipes are in. An inspection by a professional plumber gives you answers instead of guesses. Tree Roots and External Blockages Here is something you have probably never thought about. Trees outside your house are actively trying to get into your pipes. Roots seek moisture and your sewer line is full of it. A tiny crack or loose joint is all they need. Once inside, they grow. Slowly at first, then faster as they feast on the nutrients flowing through

Scroll to Top